
Is it just me, or does it feel like we have had many more serious weather events and disasters over the last two years than ever before? Perhaps it feels this way because I was sheltered and protected from weather events while growing up, but now that I'm an adult, and a homeowner, it sure feels like Maryland gets slammed a few times per year.
This morning, while I laid in bed listening to the heavy rain that had already begun to fall outside, I thought it would be the perfect day to stay home all day in PJs, eat breakfast at 11AM and lineup a few movies for B and I to watch to pass the time. As long as our power stays on.
Despite my efforts, B still had to head to work for at least a half day, and I have found myself counting down the hours until he walks through that door, and I can quit worrying about him being forty minutes from home in this weather.
We are planning on settling into hibernation mode tonight. We've got our flashlights, batteries, candles and water all lined up, and it looks like this Frankenstorm is here to stay for a while. For all of you that will be affected by this storm, please stay safe!
Like I mentioned over the weekend, this past week was pretty busy for me, and I spent most of the last two days preparing for the storms' arrival, so I definitely dropped the ball on my new Pin-tastic craft for today. But, when I popped on over to check out AP's post this morning, her archived project reminded me that I have a few projects in the archives that are worth sharing as well!

Today's project is one of my favorite Pinterest inspired crafts. Not only is it good for any season or room in your house, it is also affordable. We gets tons of compliments on ours. My inspiration for this project came from this pin. A picture with no tutorial, but I assumed it self explanatory enough to be able to complete it with just that. So, off I went.
DIY: Curtain Rod Picture Frame Hanger
What You'll Need
One (1) 24-48" curtain rod with hardware for hanging
One (1) 8x10" picture frame (preferably for wall hanging, but not a necessity)
Two (2) 5x7" picture frames (above applies here as well)
One (1) spool of thick, white ribbon (or ribbon of your choice, but it should be sturdy)
Hot Glue Gun
Glue Sticks
Start
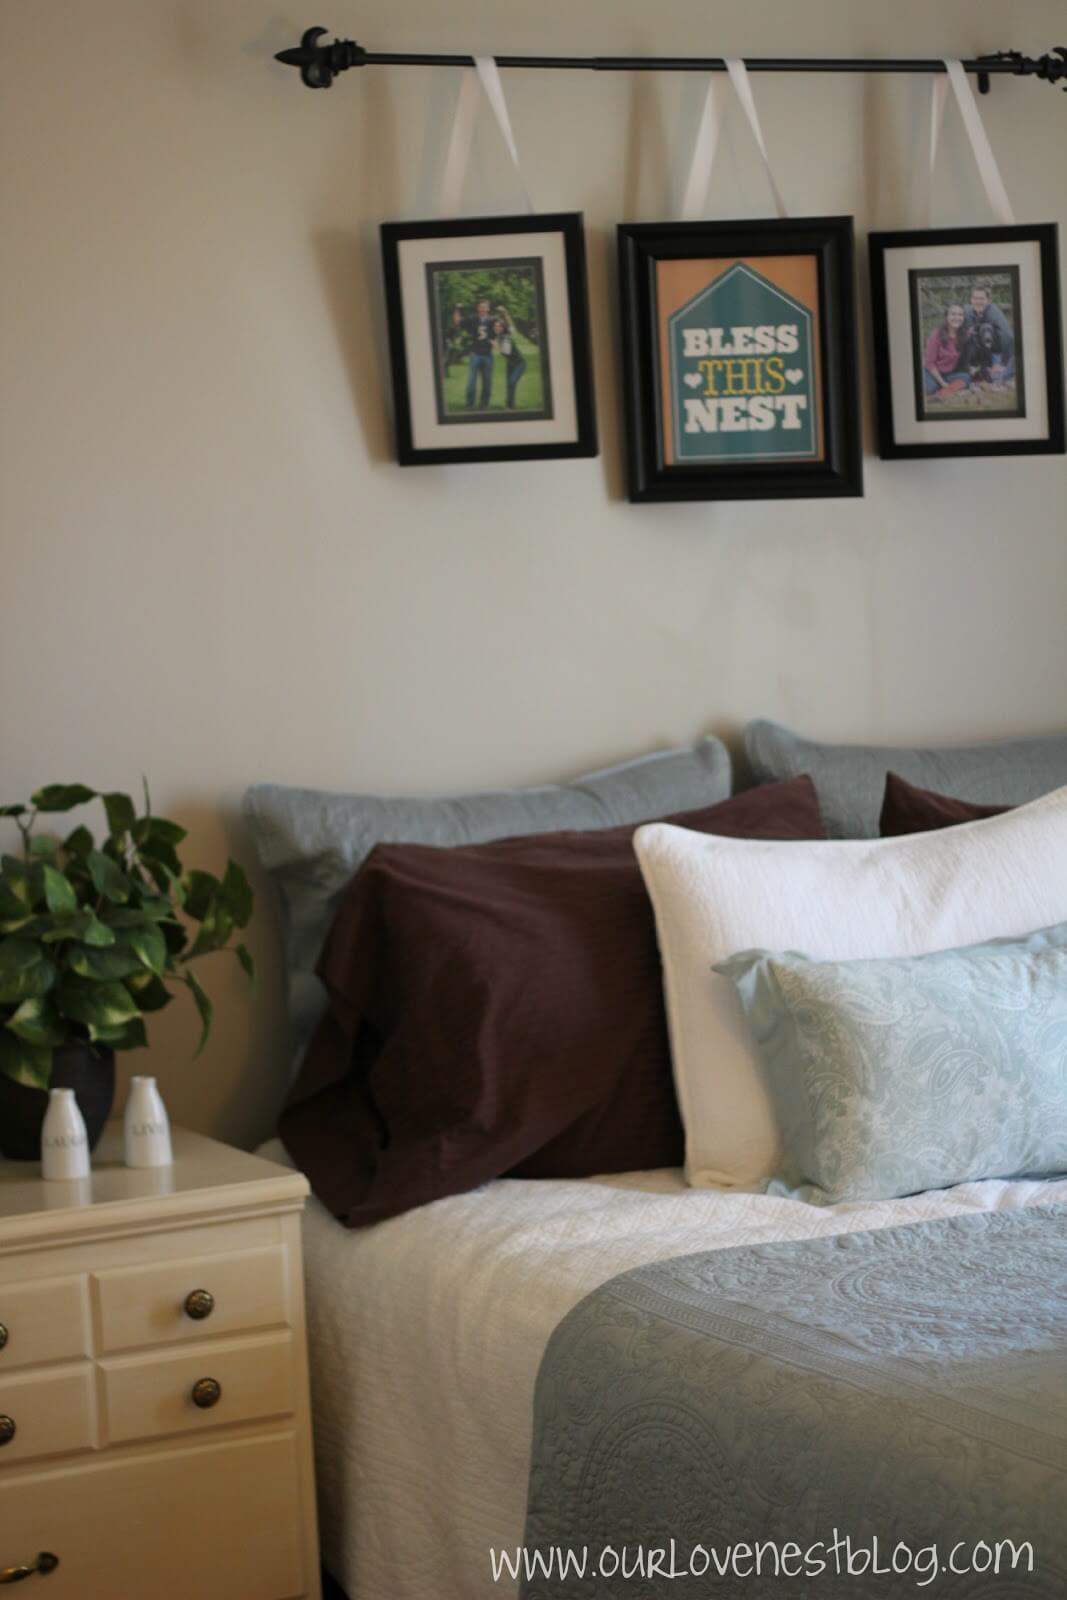
by hanging the curtain rod on the wall in the place of your choice. I
chose to hang ours over the bed in our guest room, and I also recruited B
to hang it for me.
Gather your frames and select your favorite prints or images for each.
Then, begin gluing your ribbon to the backs of each frame.

Make sure to press down on the hot glue while it dries so that the ribbon is held tightly in place on the back of each frame.
Next, hang each frame from the curtain rod and place rod back into brackets.
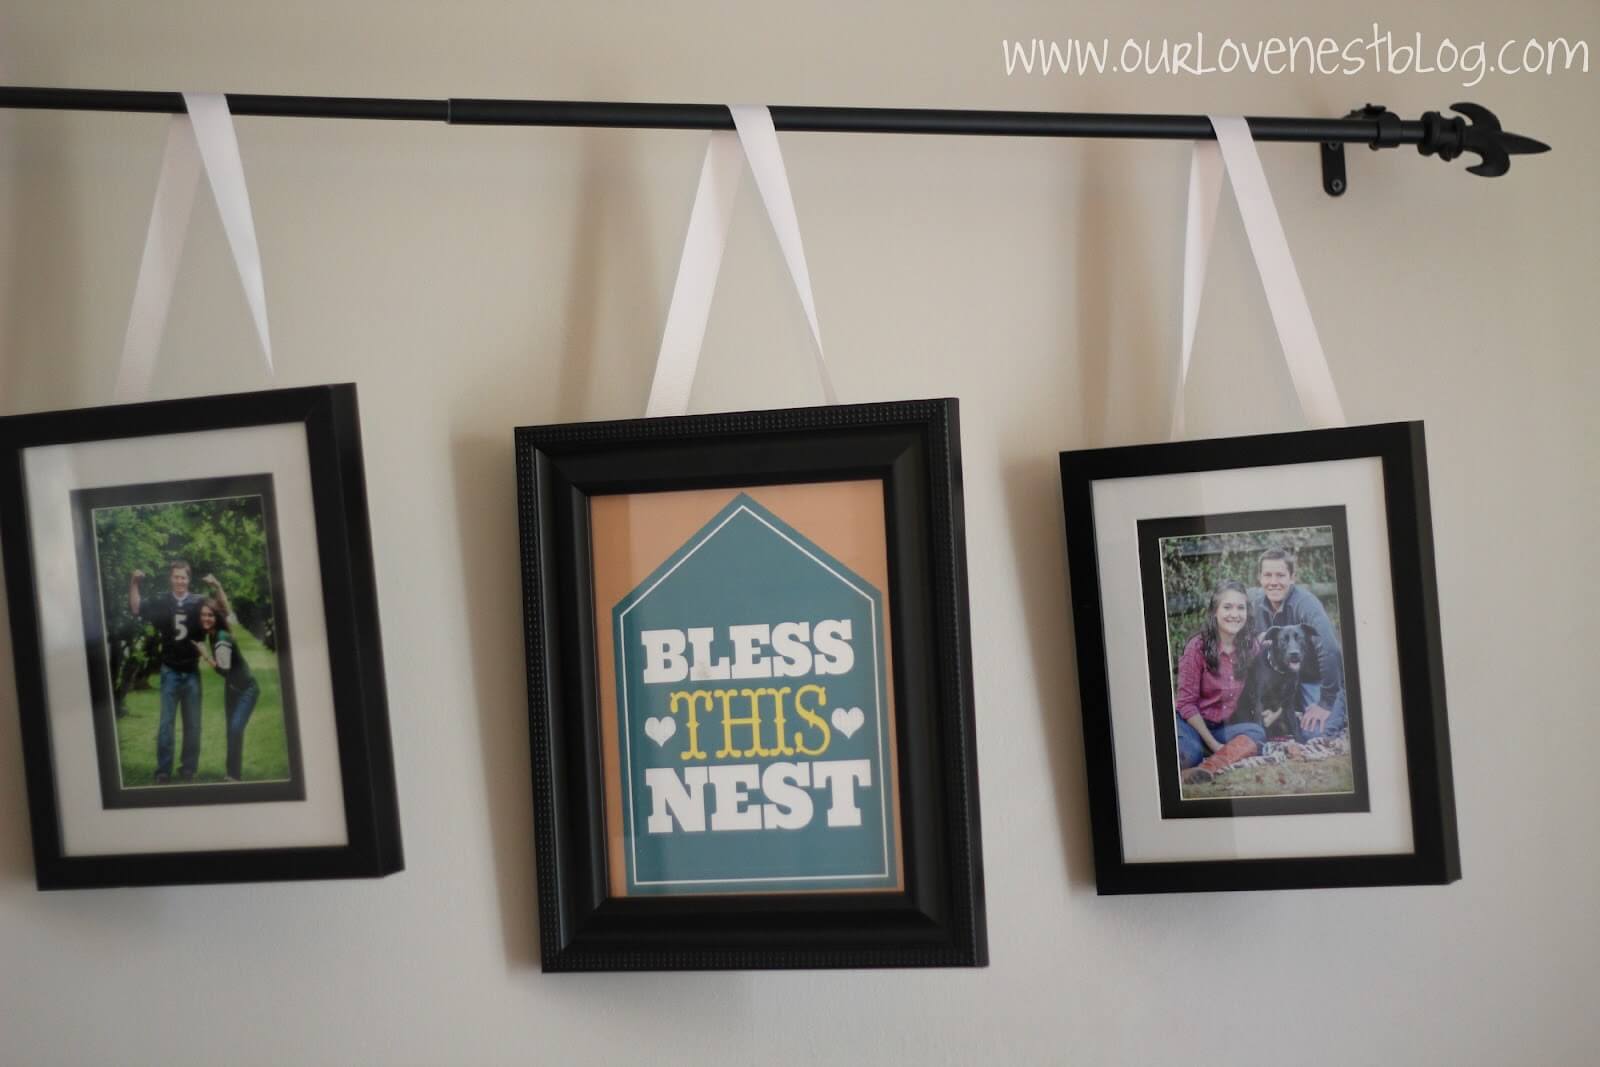
Adjust the frames so they are equally spaced apart.
Lastly, take a step back and check out your new masterpiece! It's really that easy!
I
think this added the perfect touch to our guest room since I don't have
the money to buy a headboard for this room, and the entire project only
cost me about $35! How's that for decorating on the cheap? :o)
2 comments:
Love it! And love your guest room bedding too.
This is really cute! Thanks for going back in the archives! :)
Post a Comment