
Today, the giveaway's continue over at Mandy's blog! Mandy so kindly offered to host a giveaway for us, and my team member, Britt is sponsoring the fabulous item that she will be giving away this week.
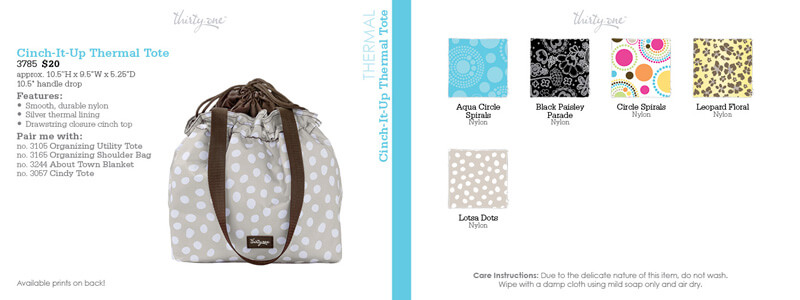
Go ahead over and enter for a chance to win a 'Cinch-Up Thermal Tote' in Black Paisley Parade, and don't forget to thank Mandy and Britt!
----------------------------------------------------------------------------------------------------------------------------------------------------------
Now, for the 'meat' of today's post, I wanted to share another DIY project that my hubby helped me perfect over the last week or two. It shouldn't come as a surprise that this project was also inspired by Pinterest, and more specifically, this pin.
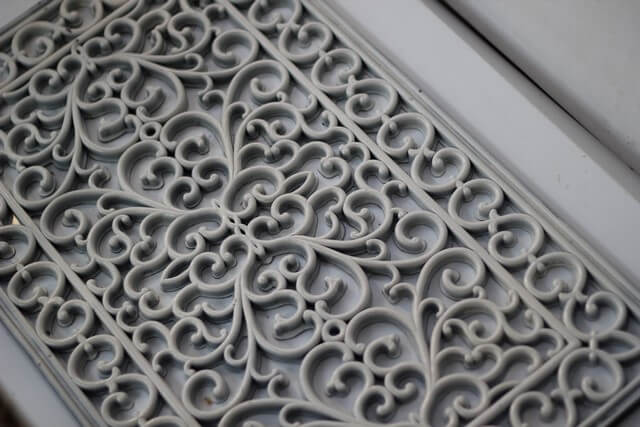
The minute I saw this pin, I couldn't believe that I had never thought of this idea before. I already owned about 3 rubber mats in that style, so I knew this would be a fun and inexpensive way to fill the blank wall behind the TV in our living room.
DIY Wall Art
What You'll Need
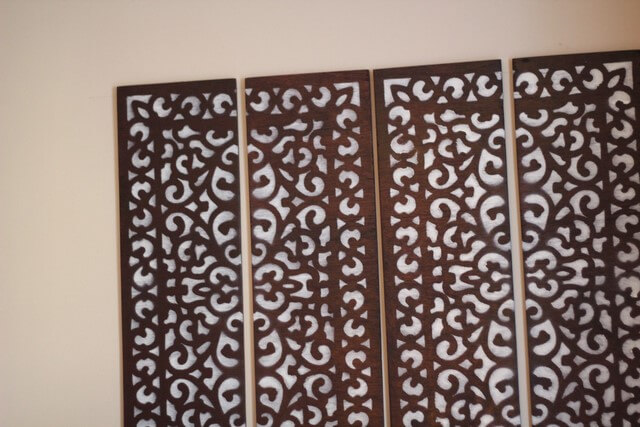
1 Rubber Mat in the size of your choice (ours was 18x36")
1 large piece of wood, about 1/2" to 1 inch thick
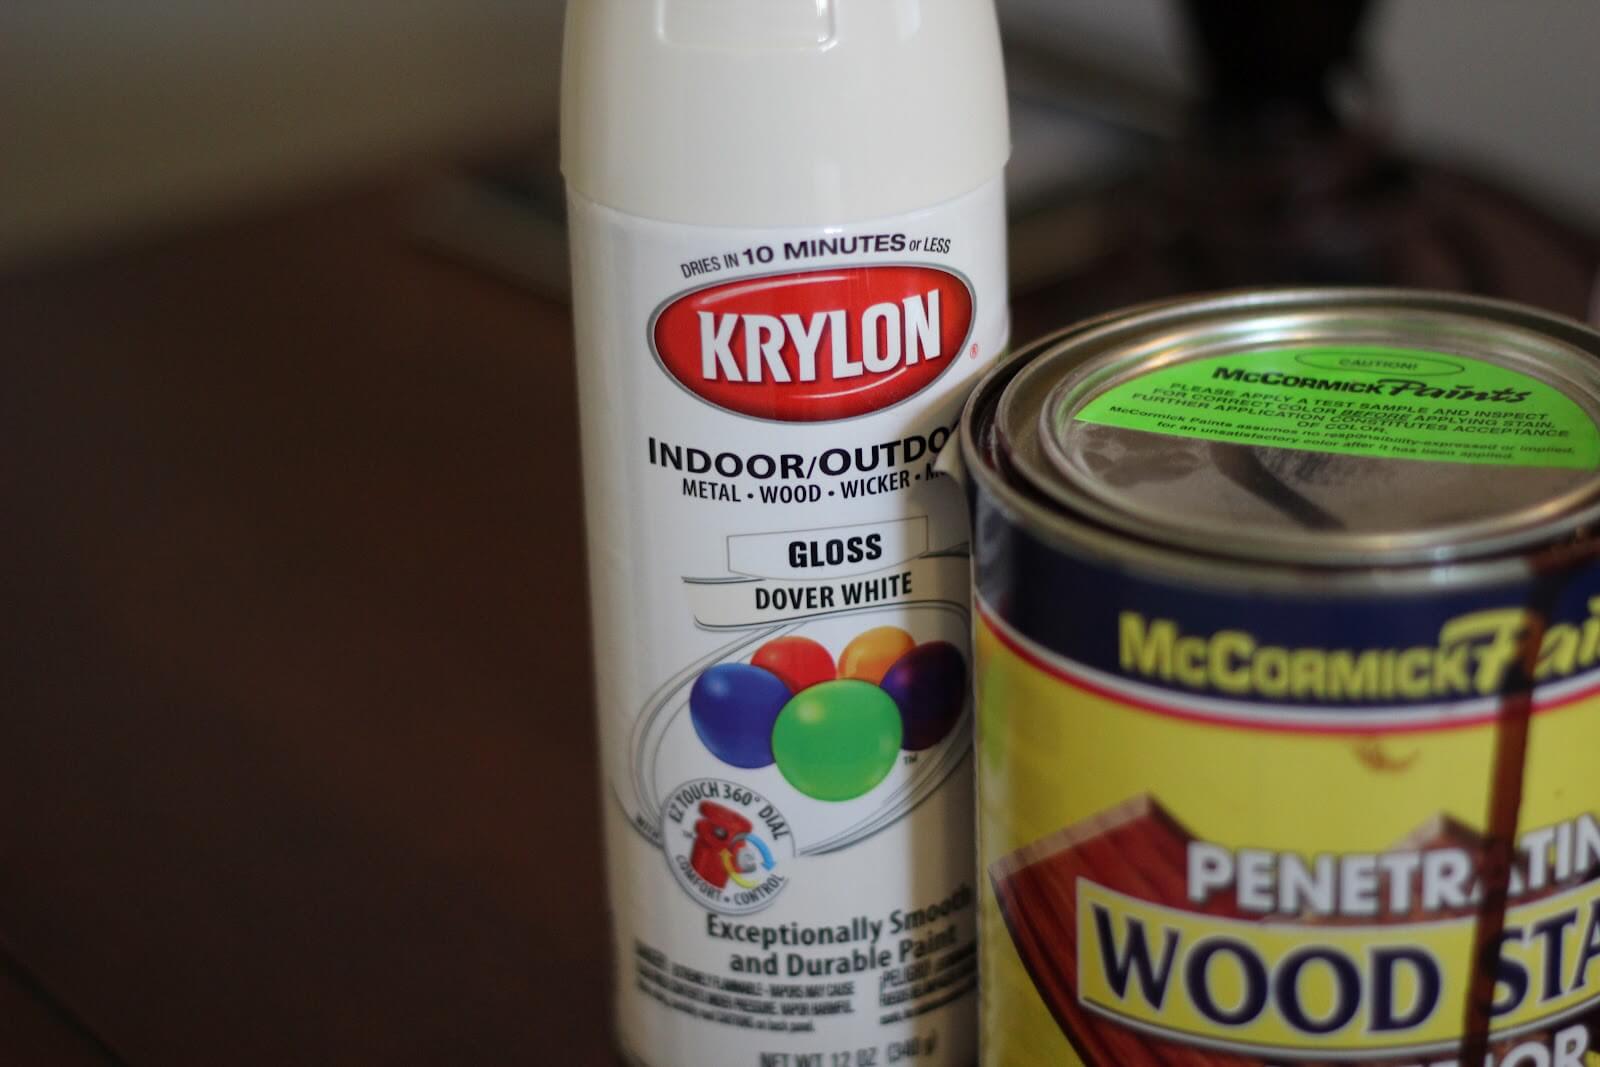
1 can of white spray paint (I used Rustoleum's Dover White)
1 can of wood stain
1 spray can of polyurethane
Begin by cutting your wood into four (4) equal pieces. Ours evened out at 9x36" each. Once the wood is cut, lightly sand each piece to get rid of rough edges, etc.
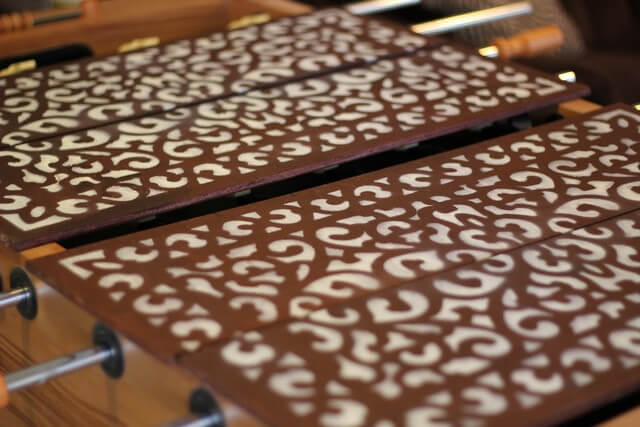
Next, coat each wood piece in your wood stain. We chose a dark cherry because we already had it lying around the house. Allow the stain to dry overnight.
Then, I laid two (2) of our wood pieces next to each other and placed the rubber mat on top so it covered the entire 18x36" surface. I began spraying the white paint, and did a thick coat. Make sure to spray from a few angles so you get into all of the crevices of the pattern. Sallow everything to dry for about 30-60 minutes.
Remove the rubber mat and place over the next set of two (2) wood pieces. Repeat the above process.
Once the wood is dry, remove the rubber mat and allow all of the wood to set overnight.
Finish up your project the next day by spraying an even layer of polyurethane over the entire project. Allow to dry overnight one more time!
We decided to hang our art in our living room. Because B had gotten the wood from his job site, we had to add our own mounting hardware to each wood piece. We used the metal tooth frame hangers that we had and affixed them to the back of each piece.
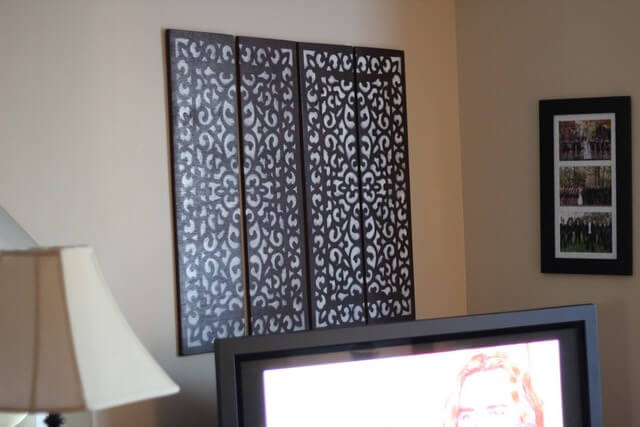
All in all, I am pleased with the way this project turned out. I think it fills the space on that wall very well, and it's different than the rest of the wall art that I have bought to fill our new home. B even mentioned that he liked it because it had a bit of a 'tribal' flare to it! I'll take it.
Happy Tuesday, lovelies!! Don't forget to check back tomorrow for even more Thirty-One giveaways!
1 comment:
Wow that looks amazing! I want to do this too now!
Post a Comment